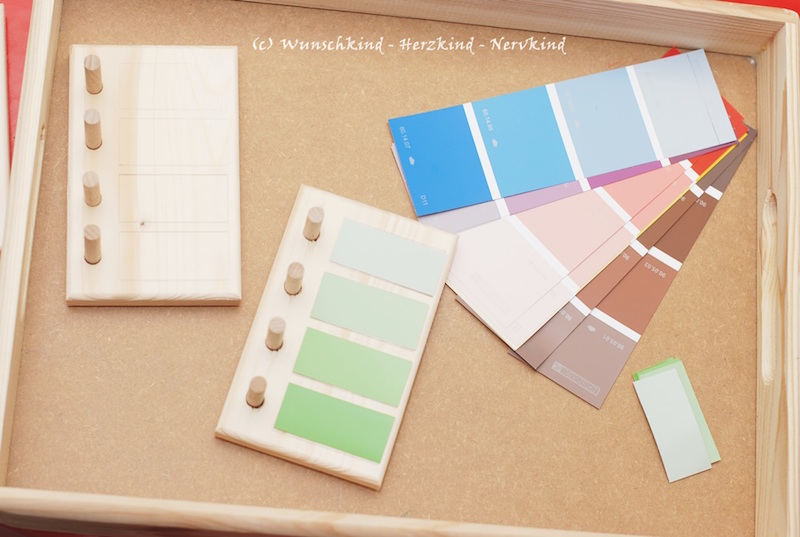
'ligther than... and darker than' in the colours of the rainbow

A guestpost from: Wunschkind-Herzkind-Nervkind
"Part of the shade sorting box is to distinguish the different colours, on top of that their shades will be recognised. Therefore the concept of light, dark, lighter than, darker than, ect. will be learned. Since the shades are marked on the box already, it is easier for the little ones to recognise eventual mistakes."
This instruction and the pictures are contributed by Sabrina from Wunschkind-Herzkind-Nervkind. There you will also find the instruction and description of how to present the materials and how the child can work with it.

Things needed
- One wood board per colour (approx. 10cm x 18cm and 2cm thick - check the plywood box for off-cuts in your hardware store and have them cut to size)
- Dowel rod (approx. 8mm diameter),
- Color sample cards or construction paper
- possibly a mitre box with saw on 90° or another saw
- drill with wood drill bit in 8mm or 10mm
- Sandpaper
- Transfer paper tape
- Scissors and a hole punch

Steps
Using the saw cut the round dowel pole into 3-4 cm long pieces or to the size you would like them to be. Sand the edges of the wood boards and round dowel pieces.
Choose the shades from your colour cards and cut two squares each. One larger square for the board and a smaller one for the wood dowel.
Place the squares onto the wood board and make drill wholes on the left side of the cards. Choose the drill size accoring to the dowel size you have chosen, start smaller and drill it bigger if you have to. Sand the wholes.
Glue the big squares onto the board and fix with adhesive foil. Wrap the little squares aound the wood dowel pieces and also fix with adhesive foil.
If you want make dots with a whole punch and glue to the end of the round dowels.
No time to make your own?
There is a readymade alternative:
Next step: deepening knowlegde, following interests:
- Interests: Shades Colors
- Skills: Fine motor skills Hand-eye-coordination
- Type of play: Peg game
- Sensitiv period: Sensitivity for Order

